SCCM Clients BASICS
How to install SCCM client on a computer?
SCCM
client can be installed through number of ways.
1. Install SCCM 2012 client by client push
2. Install SSCM 2012 Client by using
software update based installation
3. Install SSCM 2012 client using group
policy
4. Install SSCM 2012 client manually
5. Install SSCM 2012 client using logon
script
6. Install SSCM 2012 client while
operating system deployment
Install
SCCM 2012 Client by Client push
Client
push installation installs the SCCM client software on computers that
Configuration Manager has discovered. Configuring client push installation for a site, and
client installation will automatically run on the computers that are discovered
within the site's configured boundaries when those boundaries are configured as
a boundary group.
Configuring the sites to
automatically use client push for discovered computer
·
In
the Configuration Manager console, navigate to
Administration.
·
In
the Administration
workspace, expand Site
Configuration, and then click Sites.
·
In
the Sites
list, here it enables you to select the site for which you want to configure
automatic site-wide client push installation.
·
On
the Home
tab, in the Settings
group, click Client
Installation Settings, and then click Client Push Installation.
·
On
the General
tab of the Client
Push Installation Properties dialog box, select Enable automatic site-wide
client push installation. Select the system types to which
Configuration Manager should push the client software by selecting Servers, Workstations,
or Configuration
Manager site system servers. The default selection is Servers and Workstations.
·
Select
whether you want automatic site-wide client push installation to install the
System Center 2012 Configuration Manager client software on
domain controllers.
·
On
the Accounts
tab, specify one or more accounts for System Center 2012
Configuration Manager to use when connecting to the computer to install
the client software. Click the Create
icon, enter the User
name and Password,
confirm the password, and then click OK.
If you do not specify at least one client push installation account,
System Center 2012 Configuration Manager tries to use the site
system computer account. The account must have local administrator rights on
every computer on which you want to install the client.
Using the Client push
installation wizard
·
In the Configuration Manager
console, navigate to Assets and
Compliance.
·
In the Assets and Compliance
workspace, select one or more computers, or a collection of computers.
·
On the Home tab, choose one
of the following:
o
To install the client to a single
computer or multiple computers, in the Device group, click Install
Client.
o
To install the client to a
collection of computers, in the Collection group, click Install
Client.
·
On the Before You Begin page of the Install Client Wizard, review the information, and then click Next.
·
On the Installation options
page, configure whether the client can be installed on domain controllers,
whether the client will be reinstalled, upgraded, or repaired on computers with
an existing client, and the name of the site that will install the client
software. Click Next.
·
Review the installation settings,
and then close the wizard.
Install SSCM 2012 Client by using
software update based installation
Software
update-based client installation publishes the SCCM 2012 client to a
software update point as an additional software update. This method of client
installation can be used to install
client on computers that do not already have the client installed or to
upgrade existing System Center 2012 Configuration Manager
clients.
If a
computer has client installed, Configuration Manager provides the client with
the software update point server name and port from which to obtain software
updates. This information is included in the client policy.
If a
computer does not have client installed, you must configure and assign a Group
Policy Object (GPO) in Active Directory Domain Services to specify the software
update point server name from which the computer will obtain software updates.
You
cannot add command-line properties to a software update-based client
installation. If you have extended the Active Directory schema for SCCM 2012, client computers automatically query
Active Directory Domain Services for installation properties when they install.
Configure
GPO in active directory domain services to specify software update point for
client installation and software update
·
Use
the Group Policy Management Console to open a new or existing Group Policy
Object.
·
In
the console, expand Computer Configuration, expand Administrative
Templates, expand Windows Components, and then click Windows
Update.
·
Open
the properties of the setting Specify intranet Microsoft update service
location, and then click Enabled.
·
In
the box Set the intranet update service for detecting updates, specify
the name of the software update point server that you want to use and the port.
These must match exactly the server name format and the port being used by the
software update point:
o
If
the Configuration Manager site system is configured to use a fully qualified
domain name (FQDN), specify the server name by using FQDN format.
o
If
the Configuration Manager site system is not configured to use a fully
qualified domain name (FQDN), specify the server name by using a short name
format. For example (http://SCCMServer1.anu.com:8530)
·
Assign
the Group Policy Object to the computers on which you want to install the
Configuration Manager client and receive software updates.
Publishing the SCCM client to the
software update point
·
In
the Configuration Manager console, click Administration.
·
In
the Administration
workspace, expand Site
Configuration, and then click Sites.
·
In
the Sites
list, select the site for which you want to configure software update-based
client installation.
·
On
the Home
tab, in the Settings
group, click Client
Installation Settings, and then click Software Update-Based Client
Installation.
·
In
the Software
Update Point Client Installation Properties dialog box, select Enable software update-based
client installation to enable this client installation method.
·
If
the client software on the System Center 2012
Configuration Manager site server is a later version than the client
version stored on the software update point, the Later Version of Client Package
Detected dialog box opens. Click Yes to publish
the most recent version of the client software to the software update point.
Installing SSCM 2012 client using group policy
When
assigning the SCCM client to computers by using Group Policy, the client
installs when the computer first starts. When you publish the
System Center 2012 Configuration Manager client to users by
using Group Policy, the client displays in the Control Panel Add or Remove Programs
for the computer for the user to install.
Use
the Windows Installer package (CCMSetup.msi) for Group Policy-based
installations. This file is found in the folder <ConfigMgr installation directory>\bin\i386
SCCM 2012 site server. You cannot add properties to this file to modify
installation behavior
Installing SSCM 2012 client manually
Manually
installing SCCM client software on
computers by using the CCMSetup.exe
program. This program and its supporting files can be found in the Client folder
of the System Center 2012 Configuration Manager installation
folder on the site server and on management points in your site. This folder is
shared to the network as <Site
Server Name>\SMS_<Site Code>\Client.
For
example, specify the following command line CCMSetup.exe /mp:SCCMServerName /logon SMSSITECODE=AUTO
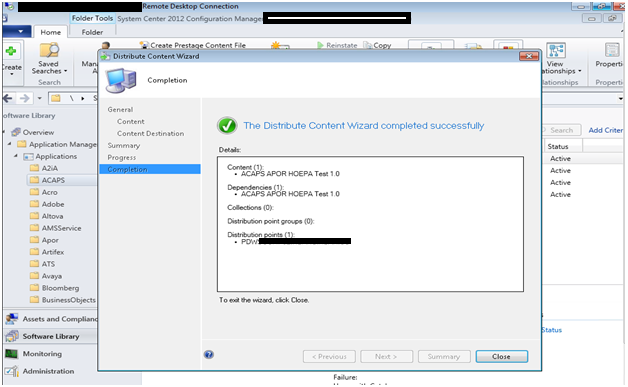
How to check if the client installation is
succeeded or not?
Solution:
The client installation status can be verified using the log file or Control
panel icons.
To
check the log file, navigate to C:\Windows\System32\ccmsetup of the client
computer and open the ccmsetup.log and clientmsi.log file. If the installation
is success then you can see a “Installation Succeeded” line updated in the log
file.
Also you can navigate
to Start->Control panel and look for configuration manager icon entry
(assuming that the control panel view is set to small icons).
How to uninstall a client?
Solution:
To uninstall a client from the client computer, execute the following command
on the client computer.
Ccmsetup.exe
/uninstall
To
run this command open a cmd prompt and change (cd) to the
directory where ccmsetup.exe can be found (most likely in
%windir%\system32\ccmsetup on 32bit versions of Windows). Then you can run
ccmsetup.exe /uninstall.
To confirm the Un-installation of the client, verify that
the control panel icon is gone and ccmExec.exe process will be removed.
How to Speed up software advertisement by forcing Policy Retrieval
& Evaluation cycle?
Solution:
Open control panel, navigate to Configuration manager icon and click on it. As
the ConfigMgr window pops up switch to action tab and initiate the “Machine
policy Retrieval & Evaluation Cycle” by clicking on “Initiate Action”
The SCCM client may not be installed properly or some agents won’t be
running on the client computer. These clients won’t be receiving any policies due
to this issue.
Solution:
This can be verified from the control panel, configuration manager icon. Open
the configuration manager item and navigate to Action tab and if you see only
some feature will be available like “User policy retrieval & Machine policy
retrieval.
Look for the Locationserives.log file from c:\windows\system32\ccm\logs and it
will contain the following error messages,
“Failed to refresh trusted key information while refreshing mp list”
“Failed to verify received message 0×80090006”
“Failed to verify received message 0x8009100e”
Follow
the below steps to resolve this issue,
• Log on to the SCCM management point computer by using an account that
has administrative permissions.
• Click Start, click Run, type services.msc in the Open box, and then
click OK.
• In the Services MMC snap-in, right-click SMS_EXECUTIVE, and then click
Stop.
• In the Services MMC snap-in, right-click SMS_SITE_COMPONENT_MANAGER, and
then click Stop.
• Click Start, click Run, type ccmdelcert in the Open box, and then click
OK.
• You receive the message: “Successfully deleted cert”.
• In the Services MMC snap-in, right-click SMS_EXECUTIVE, and then click
Start.
• In the Services MMC snap-in, right-click SMS_SITE_COMPONENT_MANAGER, and
then click Start.
How to Speed up software advertisement by forcing
Policy Retrieval & Evaluation cycle?
Solution:
Open control panel, navigate to Configuration manager icon and click on it. As
the ConfigMgr window pops up switch to action tab and initiate the “Machine
policy Retrieval & Evaluation Cycle” by clicking on “Initiate Action” once.
How to detect problems respect to no computer entry
in SCCM while computer connected to network?
There
are different reasons for a client computer not being displayed on the SCCM
Console but connected to the network.
Solution:
Check if the SCCM client is installed on the client computer by navigating to
Control panel and look for “configuration manager” icon entry (assuming that
the control panel view is set to small icons)
If
the client is installed, then open services.msc in the client computer and
verify if the SMS_AgentHost service is running, if not start the service.
Check
the Firewall enabled or disabled if enabled, allow the ports to talk to site
server
Finally
do an update of collection membership as described below,
Open
SCCM console and navigate to Assets and Compliance ->Collections ->”Right click on a
collection where the required client is not present” then select “update
collection membership”
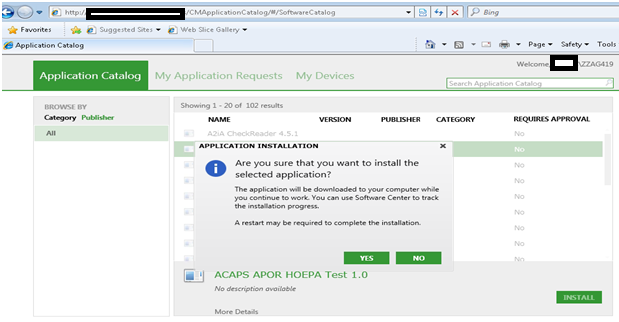
After distributing the software to the client, if
the software package gets failed to download into the client computer cache
Cause:
The software package may not be downloaded into the client computer cache if
the client does not meet the requirement.
Solution:
Ensure that the following services are up and running on the client computer
Background
intelligence Transfer service
SMS agent Host
Windows Installer
Windows Management Instrumentation
Check
if the client is contacting the DP using LocaitonServices.log file and if not
add the required DP to the package.
If the client
fails to run an deployment or if
the software distribution failed on a client computer then how to troubleshoot?
Finding
the Issue: Check the execmgr.log file in c:\windows\system32\ccm\logs on the
client computer which will capture the execution of the program. It contains
the exit code to determine the failure reason or the exact reason for the
failure, normally for success the exit code is 0. If the program is failed then
the exit code will be < or > 0. From these exit codes the reason for the
failure can be sorted out.
If
the distribution is failed on group of computers then the failure reason can be
verified by running the report named “All advertisements for a specific package”.
This report can be executed by navigating to Monitoring->Reports. In the
right hand side you can see a report named “All advertisements for a specific
package” right click on this report and run now you have to enter the package
ID of the package which is failed, finally click on display.